How To Videos
How to Add New Custom Field in FranchiseSoft?
1. Navigate to the admin menu on the left-hand side.
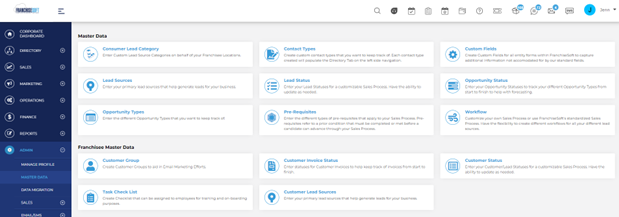
2. Choose master data from the menu.
3. On the master data screen choose custom fields from the top right corner.
4. This will display a list of all of your current custom fields.
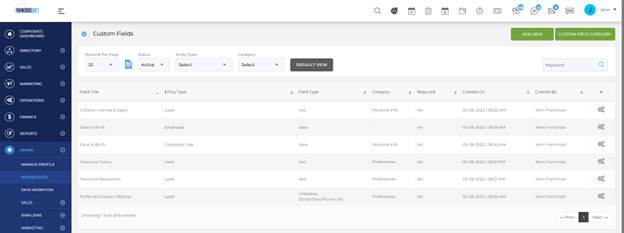
5. Please note the column that indicates entity type as custom fields will need to be created for each type of contact you would like that field to appear on. For example, if you wanted to track date of birth on vendors and employees you would need to create that custom field for both vendors and employees.
6. From this window you will click on the green add new button on the top right hand corner.
7. An “Add Custom Field” window will appear.
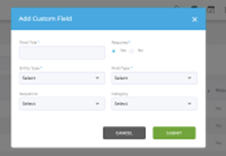
8. On the “Add Custom Field” form please note the following fields are mandatory
– Field name
– Required (checkbox)
– Entity type and
– Field type
9. Next you will add a sequence for this custom field. This is the order this field will appear in on your Custom Fields tab of a contact.
10. Choose a category for your custom field. Please note that category dropdown will only be populated if you have built Custom Field Categories. To do this please see the article Adding Custom Field Categories.
11. Once you have completed entering the data on this form, click the green submit button on the bottom right hand corner to finish the process of creating a custom field.
For More Details: https://app.franchisesoft.com/knowledge_base/article_detail/14
If you would like a DEMO of the software, kindly visit https://franchisesoft.com/ and request a Demo.
BackHappy Customers
A True Partner in Franchise Development
FranchiseSoft has been our go to solution for document management, tracked correspondence to our network, and tools to power our Franchise Development with segmentation, automation, and communication processes to take the heavy lifting off our plate. They have been a
fantastic partner in the Franchise space! Leigh Feldman CEO - Youth Franchise Brands
Why I love FranchiseSoft’s Sales CRM?
FranchiseSoft is an easy to use, afforfable and powerful CRM. It makes the FD Process a great experience for our candidates and for our team.
 Paul Pickett Chief Development Officer Wild Birds Unlimited
How FranchiseSoft delivered 100 Franchise Agreements in 2 years for Brusters Ice Cream?
It helps us communicate a consistent message and establish realistic expectations with our franchise candidates. I couldn’t do my job without this outstanding platform and their responsive customer service!
 Kim Ellis Vice President of Franchise Development & Legal at Bruster’s Real Ice Cream
How Moran Family of Brands shifted into High Gear switching to FranchiseSoft!
Using FranchiseSoft Franchise Sales CRM for 3 years. Its very user friendly and very robust, the team is easy to work with and very supportive. Making the transition was a good decision for our franchise system!
 Pete Baldine President, Moran Family of Brands
Our Franchise Clients


Get an Inside Look
With all these key components packaged into an all-in-one system, it’s no surprise that FranchiseSoft is considered the best franchise management CRM in the market.
Ready to see FranchiseSoft for yourself? Fill out the Demo Request form to schedule an inside look at our franchise management software.

Pre-recorded Demo